Preface
For founders, there comes a critical stage where monetizing your product becomes essential. One effective way to achieve this is by integrating a payment gateway.
In this article, we’ll explore the Stripe Payment Gateway and demonstrate how to integrate it using Firebase and Node.js with Express. Whether you’re a solo developer or a startup founder, this guide will provide you with the insights and steps to enable seamless payment processing for your product.
But first let’s discuss the high-level flow of the integration and how each component plays a role.
Diagram Overview
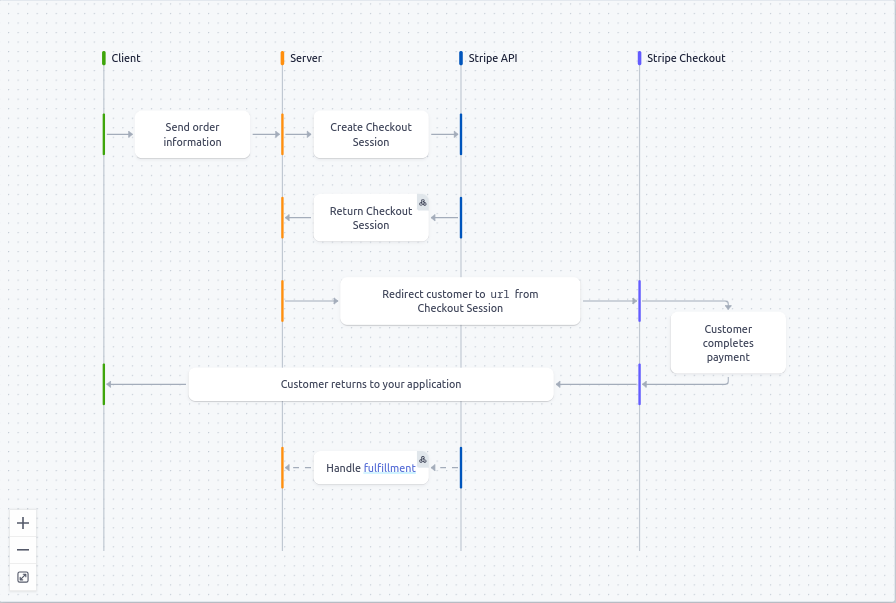
- When customers are ready to complete their purchase, your application creates a new Checkout Session.
- The Checkout Session provides a URL that redirects customers to a Stripe-hosted payment page.
- Customers enter their payment details on the payment page and complete the transaction.
- After the transaction, a webhook fulfills the order using the checkout.session.completed event.
Caveat: Since we are using Stripe Payment Links—a low-code solution—Steps 1 and 2 are no longer necessary. Instead, all that is required is navigating to a generated payment link. The backend server will handle the Stripe events via Webhooks, triggered upon the completion of a Stripe checkout session.
Requirements
1. Firebase Admin Credentials for Node Server
2. Firebase Configuration for Chrome Extension
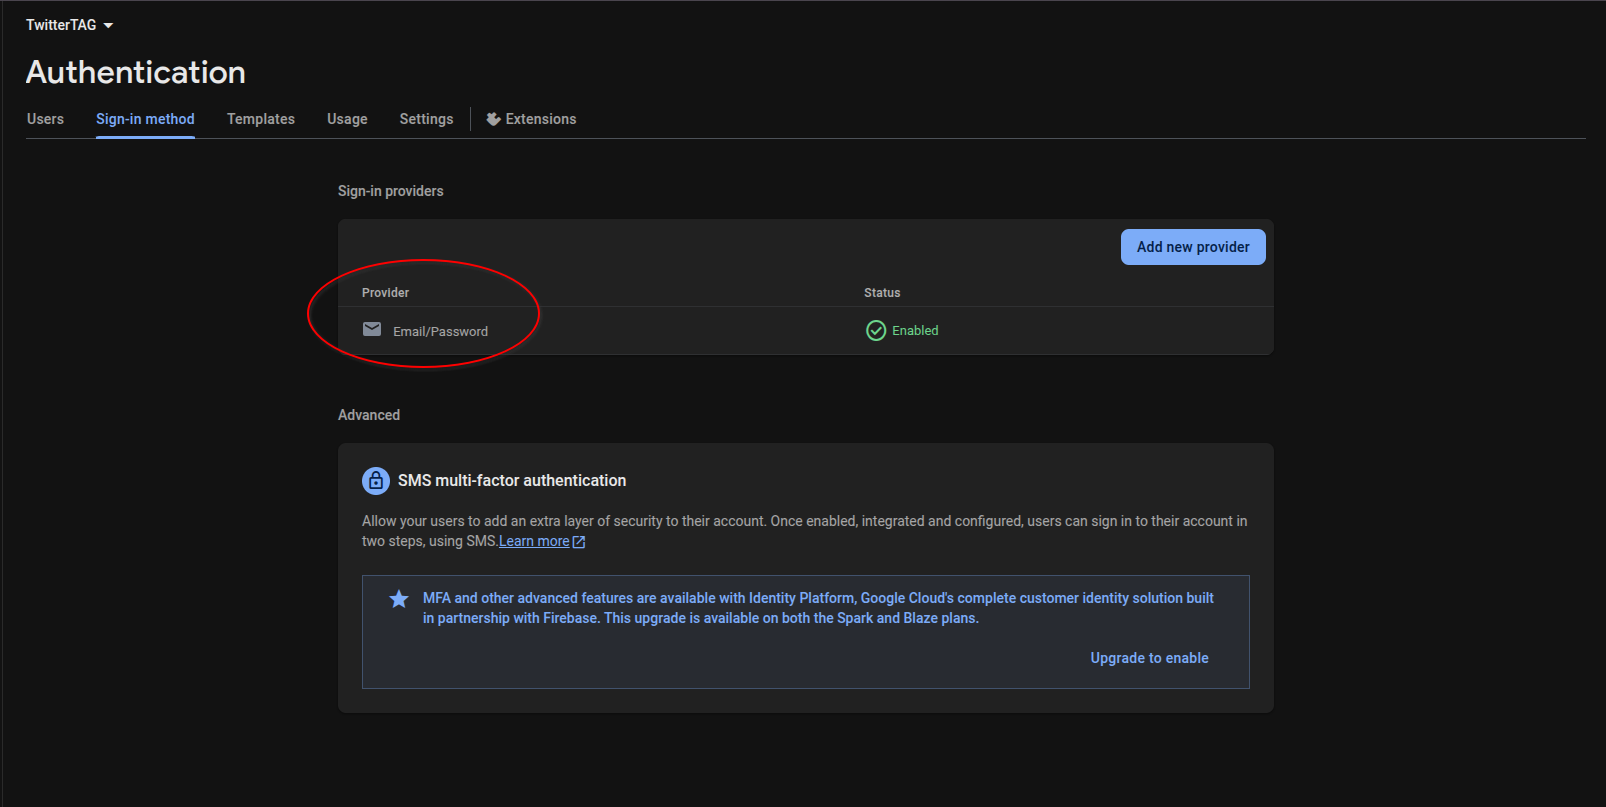
3. Firebase Authentication Email and Password Sign-method
Firebase Admin Credentials for Node Server
Download Firebase Service account JSON and create the firebase-admin.json
Firebase Configuration for Chrome Extension
Replace the firebaseConfig in TwitterPopup in src/components/ui with your Firebase configuration
Firebase Authentication Email and Password Sign-method
Why Stripe Payment Links ?
Stripe offers multiple ways to integrate payments for collection, the following are the justification for using Stripe Payment Links:
- Easy setup with minimal code
- No need to handle sensitive card information
- No Redirection for Chrome extension since we rely on Firebase for updated payment status
- Suitable for one-time payments or monthly subscriptions
Setting up Stripe Payment Links
Step 1: Create a Stripe Account
Step 2: Generate a Payment Link
Step 3: Add the Payment Link to your Chrome Extension
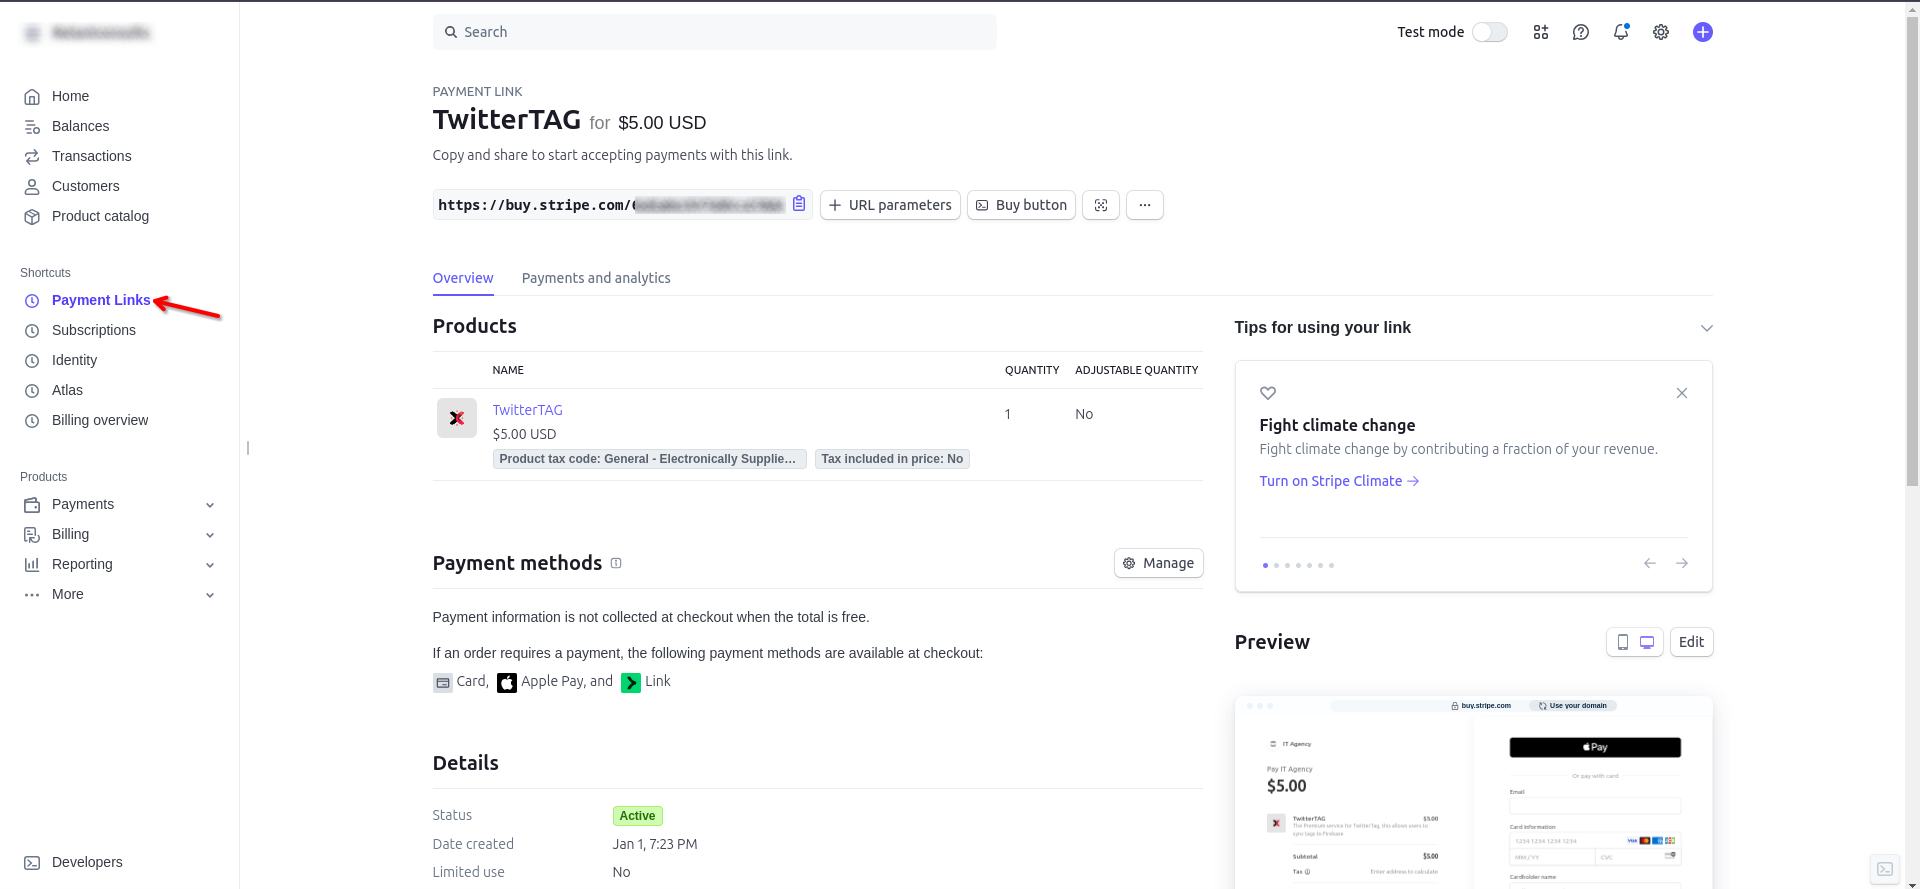
Note: There are several ways of integrating with Chrome extensions, ideally you can use either chrome.tabs.create for a Tab based approach or using a popup with chrome.windows.create. For this guide, we will be using the popup approach.
Stripe Webhooks and Stripe CLI
Stripe provides a great tool for testing webhooks locally, and it’s a feature available in the Stripe CLI, which allows you to forward events to your local server. This ensures that all events are captured and processed by your server.
To get started, install the Stripe CLI by running the following command:
Installing Stripe CLI
$ npm install -g stripe-cli
Stripe Login
$ stripe login
Forwarding Events to your Local Server
stripe listen --forward-to localhost:PORT_NUMBER/API_ENDPOINT
Note:
For the purpose of this tutorial, I have written a Stripe event listener in Node.js with Express and a Chrome extension project built with ReactTS and Zustand. The listener will capture the checkout.session.completed event and update the payment status in Firebase.
You can find the source code here for the Node Express Server here
You can also find the source code here for the Chrome Extension
Payment Flow
Before jumping into the code, we will outline the payment flow from Chrome Extension to Firebase and Node.js with Express.
Payment Flow Overview
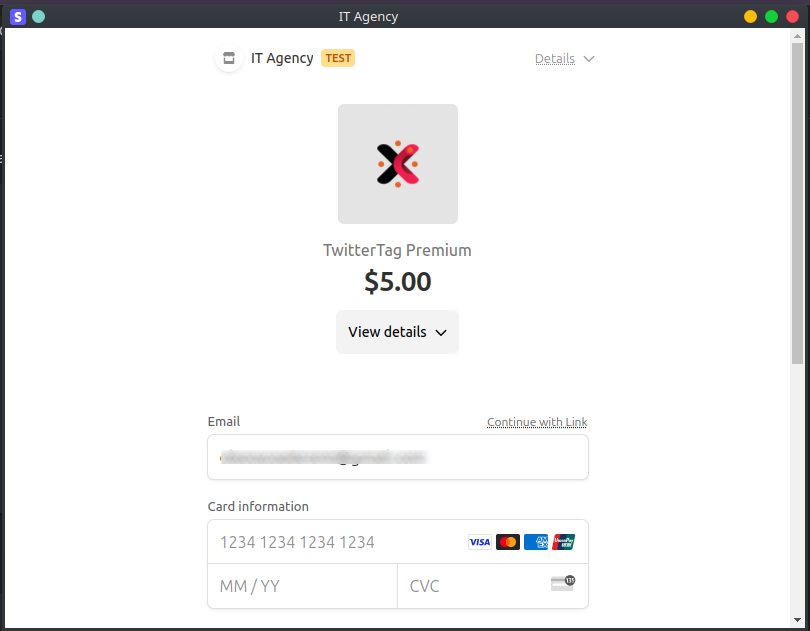
The user registers with the Chrome extension and is redirected to the Stripe-hosted payment page; upon clicking the Upgrade to premium button, the payment status is updated in Firebase along with other Stripe details.
The Node.js server listens for the checkout.session.completed event and updates the payment status in Firebase. Once the status is updated; The extension fetches the updated status from Firebase and reflects the premium state on the popup.
TwitterTAG Chrome Extension
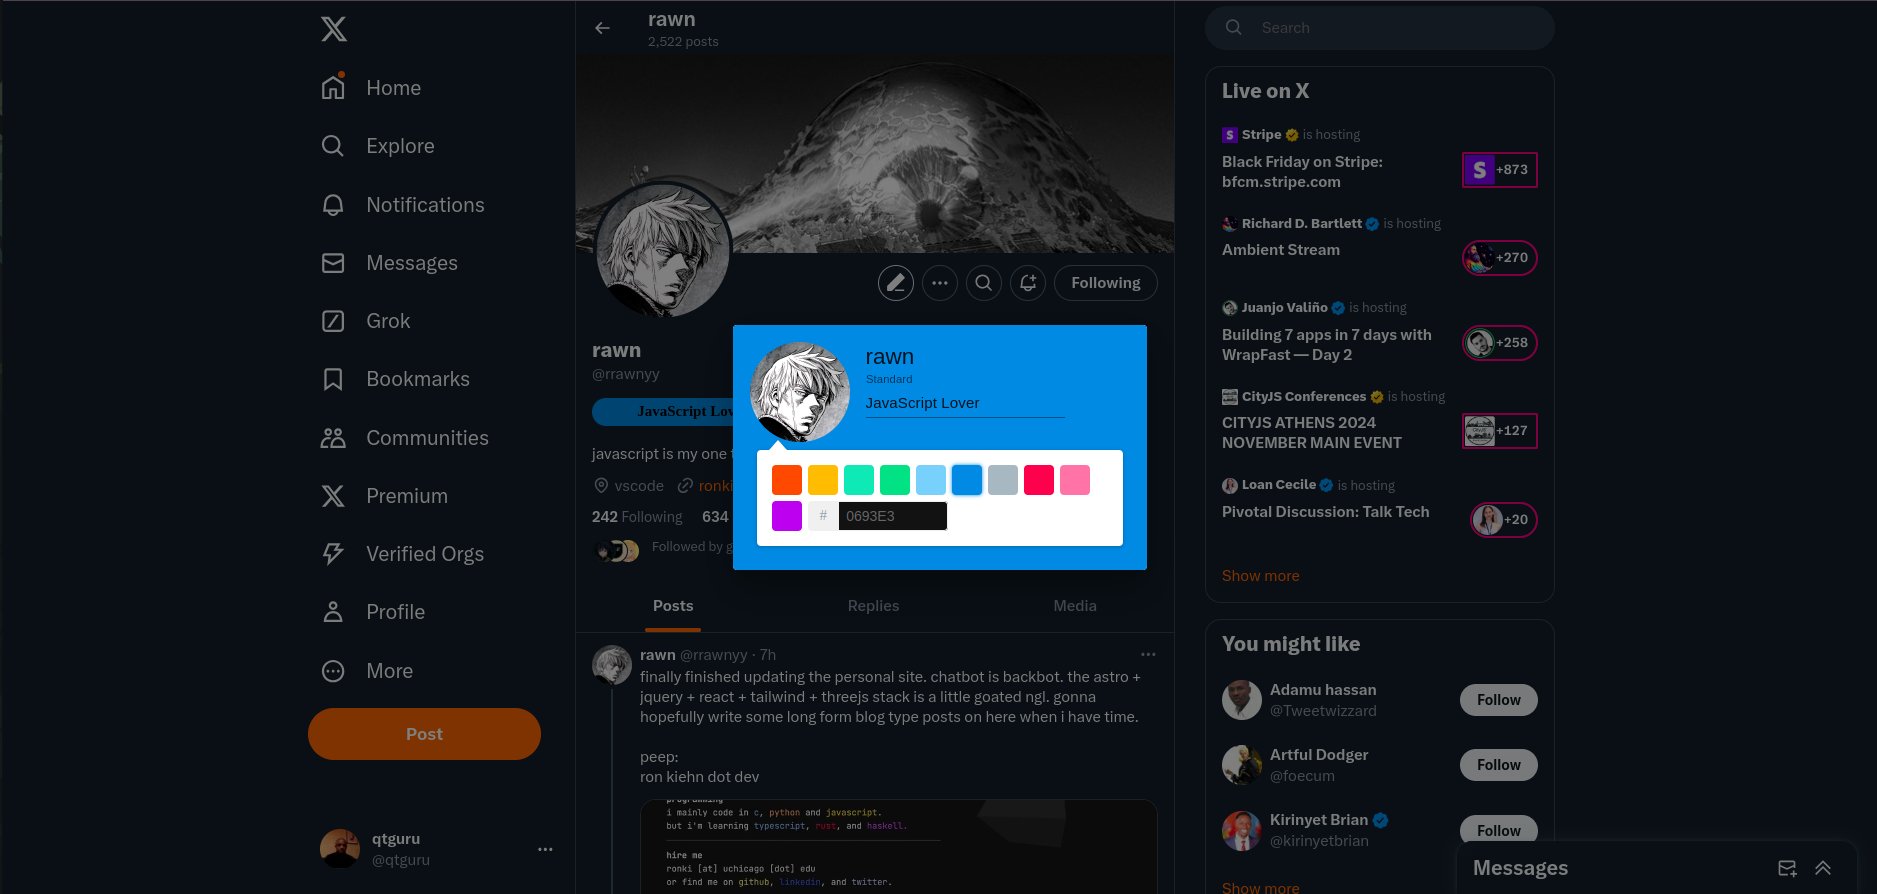
TwitterTAG is a Chrome extension that allows the user to tag Twitter/X users and save them for future reference. The extension was created for the purpose of this tutorial, however it still reflects real-world scenarios and presents an opportunity to integrate premium features as you would, for your SaaS product.

Persistence of User Tags
The Chrome extension currently stores user tags in chrome.storage.local which is hydrated by Zustand, and adpater has been created to fetch data from chrome.storage.local;
// src/Zustand/store.tag.ts
import {create} from 'zustand';
import {TwitterTagData} from "../utils/helpers";
import { persist, PersistStorage} from "zustand/middleware";


// Create the Storage for Chrome Extension
export type TwitterTagData = { color: string; profile: string; label: string };

let data: TwitterTagData[] = [];

export interface TwitterTagState {
    actions: { setTag: (tag: TwitterTagData) => void; };
    data: TwitterTagData[];
}

const chromeLocalStorage: PersistStorage<TwitterTagState> = {
    getItem: async (name) => {
        const result = await chrome.storage.local.get(name);
        if (result[name]) {
            return result[name];
        }
        return null;
    },
    setItem: async (name, value) => {
        await chrome.storage.local.set({
            [name]: value
        });
    },
    removeItem: async (name) => await chrome.storage.local.remove(name),
}
const tagStore = (set) => ({
    data: [],
    addTag: (tag: TwitterTagData) => {
        set((state: TwitterTagState) => ({
            data: [...state.data.filter(record => record.profile !== tag.profile), tag]
        }));
    }
});
export const useTags = create(
    persist(
        tagStore,
        {
            name: 'twitter-tags',
            storage: chromeLocalStorage,
            skipHydration: false,
        }
    ));
Uninstalling the extension currently results in data loss. To address this, we could introduce a premium feature that allows users to sync their data with Firebase, highlighting the value of premium offerings.
Implementing this feature would require Firebase Authentication and Firestore. Firebase Authentication would handle user login and registration, while Firestore would store user data, such as tags and premium status.
In the screenshot below, you can see Firebase Authentication enabling user login and registration. It plays a critical role in our system, as we use the UID generated by Firebase to track each user's premium status.
The Node.js Express server utilizes the same UID to update payment status in Firestore, ensuring a seamless integration between user authentication and payment processing.
The images below showcase the login process and a logged-in user with their subscription status reflected in the interface.

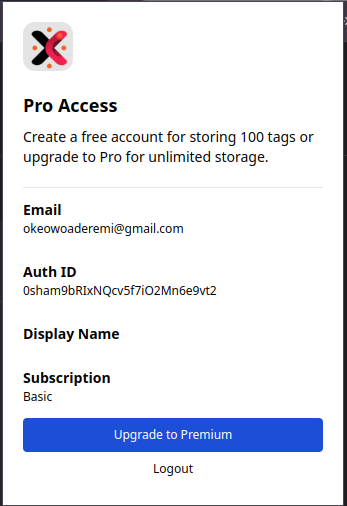
The following code snippet dispatches a message to the background script once the “Upgrade to Premium” button is clicked, which creates a popup window for Stripe payment link.
// src/components/ui/TwitterPopup.tsx
async function subscribeStripe() {
    await chrome.runtime.sendMessage({
      type: "subscribe",
      stripeLink: `${configuration.stripe}?prefilled_email=${user.email}`,
    });
  }
// src/background.ts
chrome.runtime.onMessage.addListener((message, sender) => {
    switch (message.type) {
        case "subscribe":
            // Subscribe to the user
            const { stripeLink } = message;
            chrome.windows.create({
                url: stripeLink,
                type: "popup",
                width: 800,
                height: 600,
            });
            break;
    }
});
Popup Window / Node Express Server + Stripe Webhooks
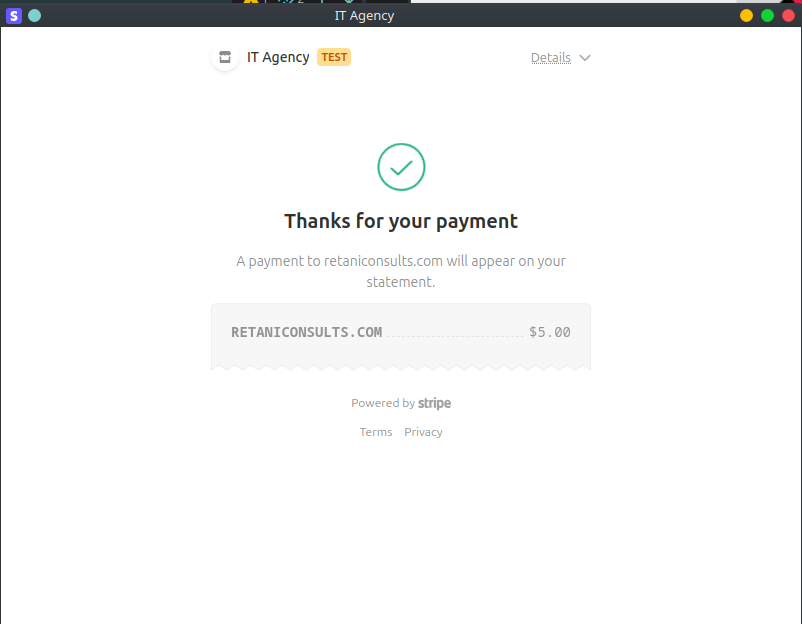
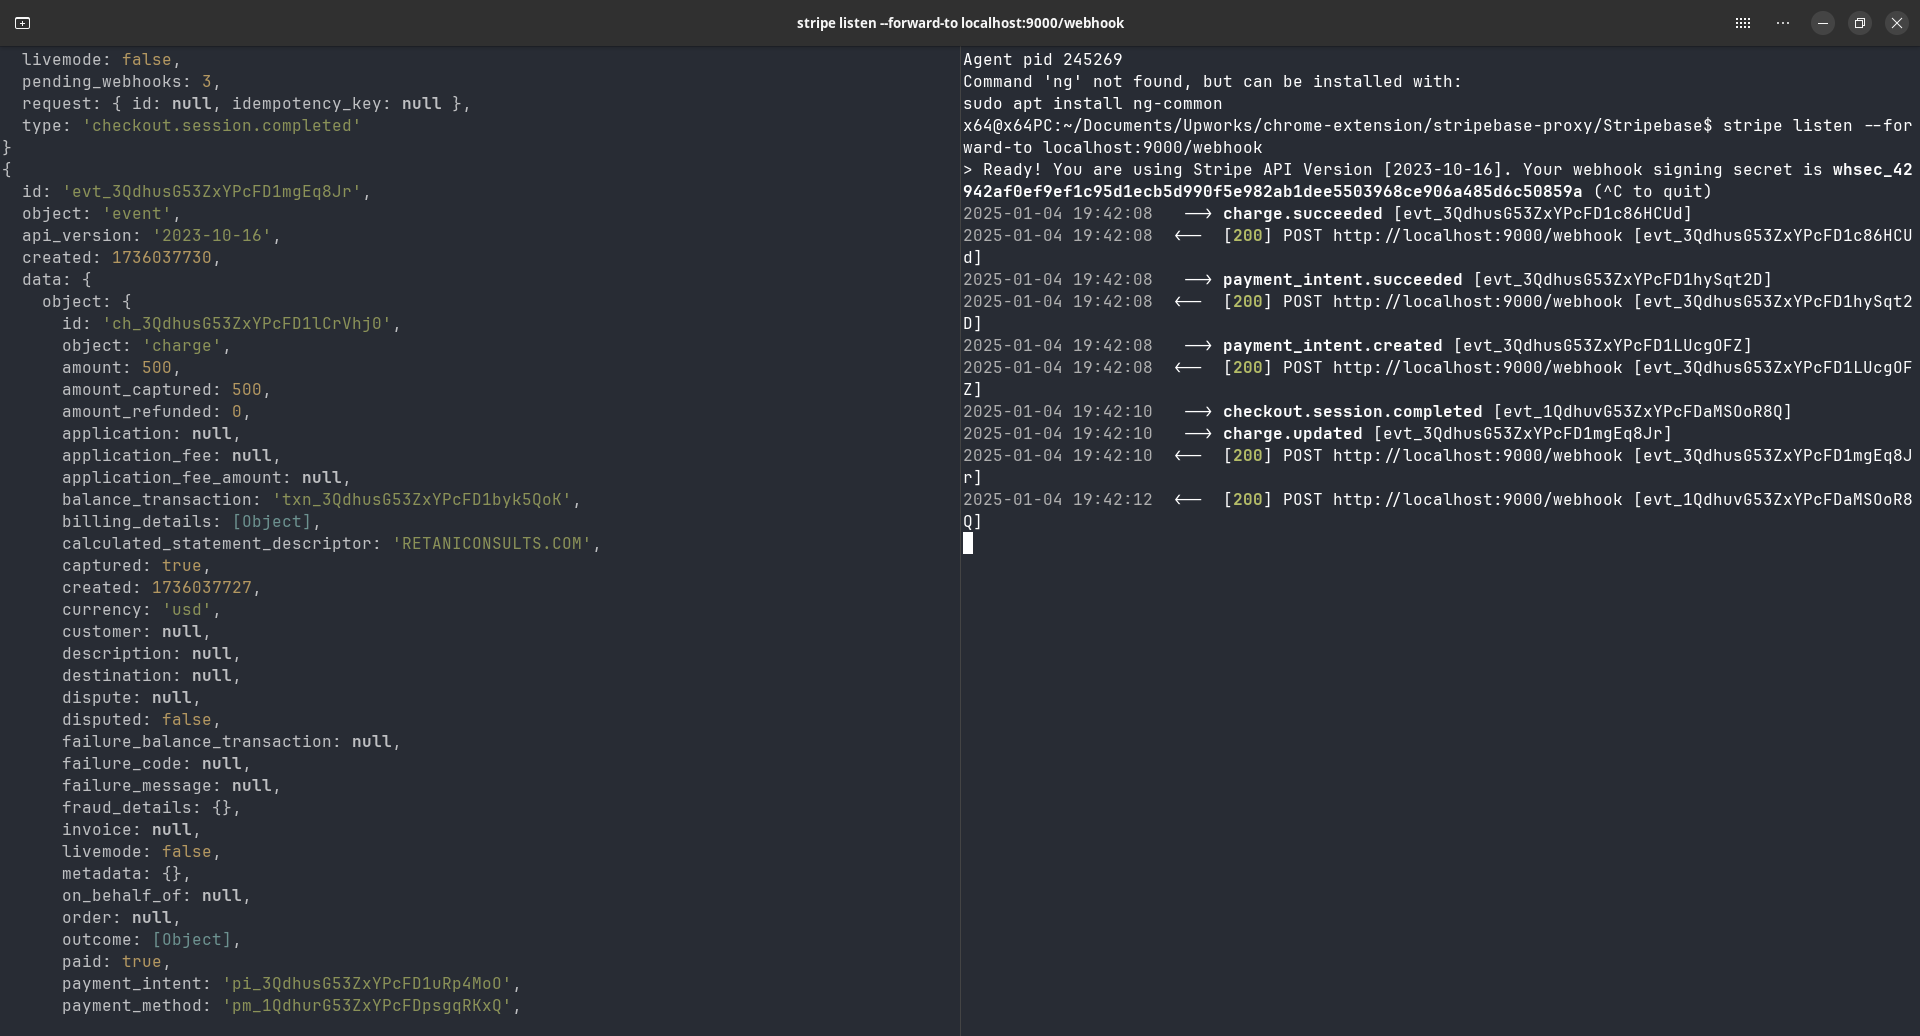
Stripe events are dispatched to your registered endpoints, this ensures that all events are forwarded to your application for processing. Webhook are handled differently depending on the mode (either live or testing). The Stripe CLI allows us to forward events to our local server for testing rather than deploying a live application, you can find more information about setting up Stripe Webhooks here.
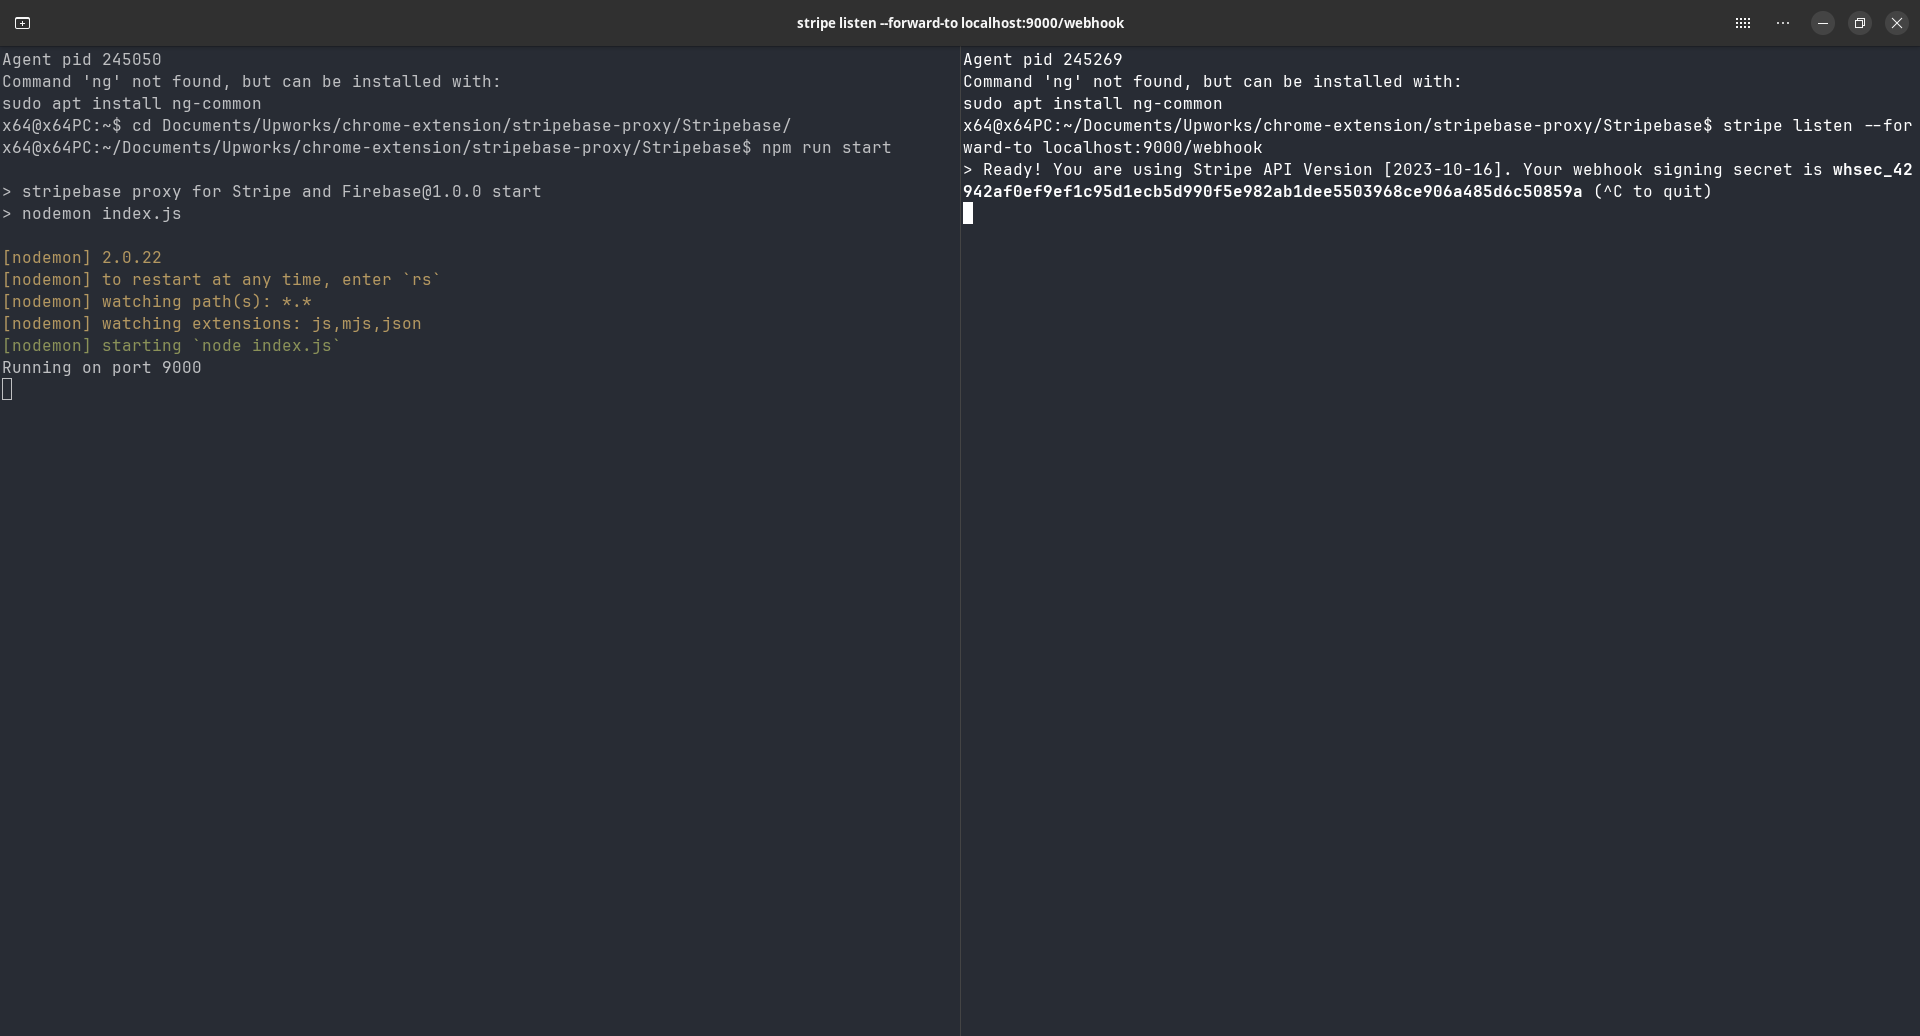
Stripe CLI and Node Express Server
Here is a screenshot of Stripe CLI and Node Server running, the Stripe CLI listens for events and forwards them to the Node server application, You can consult the Stripe events documentation to understand the order of events that are dispatched during the payment process. The common events dispatched are checkout.session.completed and payment_intent.succeeded.
Node Express Server Code Structure
The Node Express handles different Stripe events and updates the Firestore depending on the payment status. We use Firestore to update the user’s premium state which is reflected in the Chrome extension.
Here are several snippets of the Node Express server code:
The code below listens to the Stripe event, and the event type is denoted by the type property.
// src/index.ts
// Match the raw body to content type application/json
// If you are using Express v4 - v4.16 you need to use body-parser, not express, to retrieve the request body
app.post('/webhook', express.json({type: 'application/json'}), async (request, response) => {
    const event = request.body;

    console.log(event)


    switch (event.type) {

        case 'customer.updated':
        case 'customer.created':
The code snippet does the following:
-
Customer Created / Customer Updated: This event is triggered when a customer information is created or updated. This creates a customer session and sets the default premium role to basic.
-
Checkout Session Completed: This event is triggered when a customer completes a checkout session. The code checks the payment status and updates the user’s premium status in Firestore.
switch (event.type) {

            case 'customer.updated':
            case 'customer.created':
                const customerSession = event.data.object;
                if(customerSession.email === null){
                    throw new Error('Stripe Email is required to create a user');
                }

                const user = await auth.getUserByEmail(customerSession.email);
                const customerRef = fireStore
                    .collection('customers')
                    .doc(user.uid)


                const doc = await customerRef.get();
                if (!doc.exists) {
                    // exists in Firebase Authentication
                    const user = await auth.getUserByEmail(customerSession.email);
                    try {
                        await customerRef.create({
                            id: user.uid,
                            stripeId: customerSession.id,
                            email: customerSession.email,
                            name: customerSession.name,
                            phone: customerSession.phone ? customerSession.phone : "",
                            metadata: {
                                ...customerSession.metadata,
                                'firebaseRole': 'basic'
                            }
                        });
                    } catch (e) {
                        console.error(e);
                    }


                }

                break;

            case   'checkout.session.completed':

                const checkOutSession = event.data.object;

                switch (checkOutSession.payment_status) {

                    case 'paid':
                        try {
                            const user = await auth.getUserByEmail(checkOutSession.customer_details.email);
                            await auth.setCustomUserClaims(user.uid, {
                                firebaseRole: Subscription.PREMIUM
                            })
                            await createCustomer(checkOutSession);
                        } catch (e) {
                            console.error(e);
                        }

                        break;

                    case 'unpaid':
                        try {
                            const user = await auth.getUserByEmail(checkOutSession.customer_details.email);
                            await auth.setCustomUserClaims(user.uid, {
                                firebaseRole: 'basic'
                            });
                            await createCustomer(checkOutSession);
                        } catch (e) {
                            console.error(e);
                        }

                        break;
                }

                break;

            // handle subscription created and cancelled events
            case 'customer.subscription.created':
            case 'customer.subscription.deleted':
                let userUID = null;
                const subscription = event.data.object;
                if (subscription.status !== 'incomplete') {

                    const subscriptionDoc = await fireStore
                        .collection('customers')
                        .where('stripeId', '==', subscription.customer)
                        .limit(1).get();

                    if (!subscriptionDoc.empty) {
                        subscriptionDoc.forEach(doc => {
                            userUID = doc.id;
                            if (event.type === 'customer.subscription.created') {
                                fireStore.collection('customers')
                                    .doc(userUID).collection('subscriptions')
                                    .doc(subscription.id).create({
                                    ...subscription
                                }).then()

                            }

                            if(event.type === 'customer.subscription.deleted'){
                                fireStore.collection('customers').doc(userUID).update({
                                    metadata: {
                                        ...subscription.metadata,
                                        'firebaseRole': 'basic'
                                    }
                                })
                                fireStore.collection('customers')
                                    .doc(userUID).collection('subscriptions')
                                    .doc(subscription.id).delete().then()
                            }
                        });
                    }
                }


                break;
            default:
                console.log(`Unhandled event type ${event.type}`);
        }
Stripe Webhooks must be returned with a 200 status code, otherwise, Stripe will retry the request. The code snippet below returns a 200 status code for successful events.
// Return a response to acknowledge receipt of the event
        response.json({received: true});
Note:
-
Firebase Authentication sets the full display name from data gotten from Stripe
- The Node Server using Firebase Admin credentials and Firestore to update the user’s premium status
- Once payment is successful, both the premium status and the Stripe ID are updated in Firestore along with the session, this is important for tracking the user’s subscription status.
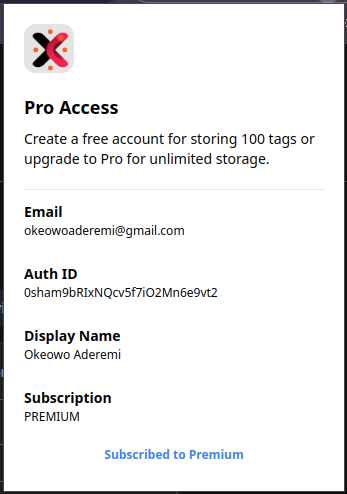
- The Chrome extension has no need to redirect to any page, once popup is re-opened, the code fetches the updated status from Firestore and reflects the premium state.
Firebase Firestore
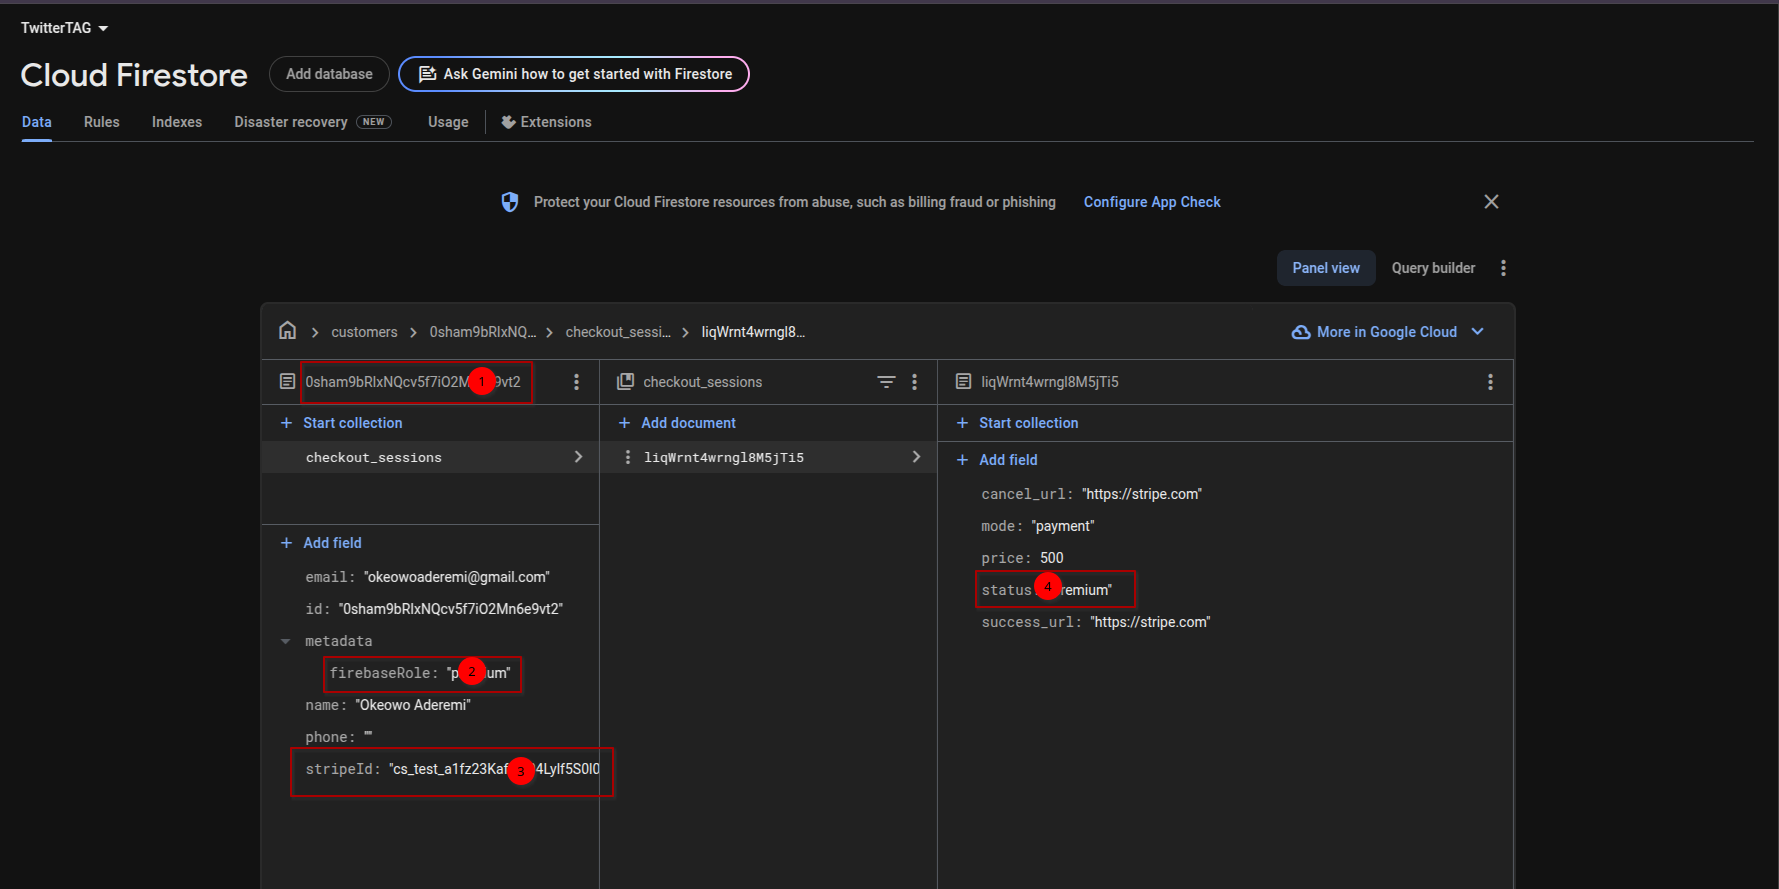
- The UID from Firebase Authentication is used to track the user’s premium status as used as the documentID for firestore, this ensures a distinct document for each user.
- The user’s premium status is updated in Firestore from the Node server.
- The Stripe ID is stored in Firestore for tracking the user’s subscription status.
- The session details are stored in Firestore for tracking the user’s subscription status.
Chrome Extension Premium Status
Once the payment is successful, the Chrome extension is now able to reflect the updated status, let’s take a look at the code snippet below:
export const TwitterPopup = () => {
    const auth = getAuth(app);

    const [user, setUser] = useState<User>(null);
    const [subscription, setSubscription] = useState<any>(null);

    // Get the premium subscription from Firebase

    useEffect(() => {
        onAuthStateChanged(auth, async (user) => {
            if (user) {
                setUser(user);
                const customersDoc = `customers/${user.uid}`;
                const docRef = doc(db, customersDoc);
                const documentSnapShot = await getDoc(docRef);
                if (documentSnapShot.exists()) {
                    setSubscription(documentSnapShot.data());
                    console.log(documentSnapShot.data());
                } else {
                    setSubscription(null);
                }
            }
        });
    }, []);
}
Cloud Firestore and Security Rules
Cloud Firestore security rules are crucial for securing your application, the rules below ensure that only authenticated users can read, allowing a write permission possesses a security threat, as this allows the client to update record from the extension. The Node Server should be the only entity that can update the user’s premium status.
rules_version = '2';

service cloud.firestore {
  match /databases/{database}/documents {
    match /{document=**} {
      allow read: if request.auth != null;
    }
  }
}
Consideration
Before deploying to a live environment, it is essential to address certain security issues to safeguard the application. One key concern is verifying Stripe requests. Since our endpoint will receive any requests dispatched to it, we must ensure that only requests verified as originating from Stripe are processed.
To achieve this, we use Stripe's webhook signature verification mechanism. When Stripe sends a request to our endpoint, it includes a signature in the request headers. We validate this signature using Stripe's SDK and the webhook secret associated with our Stripe account. This ensures that only legitimate requests from Stripe are processed, mitigating the risk of unauthorized or malicious requests.
Find the additional resources below for more information:
- Secure your Webhook Endpoint ( This ensures you only process verified Stripe Events )
- Handling Disputes
Conclusion
We explored integrating using Stripe Payment link and demonstrated how to integrate it with Firebase and Node Express. The Chrome extension now has the ability to reflect the user’s premium status. This guide provides a solid foundation for integrating payment gateways into your Chrome extension. However, this guide doesn’t cover dealing with monthly subscription and handling subscription cancellations, this will be covered in the next post or with this adequate information, you can easily provide code for the subscription events.
I will also be release a YouTube video for more indepth explanation of the integration, stay tuned for more updates and kindly share any questions or feedback in the comments section below.